
Getting Started
When the Superbase NG Integrated Development Environment (IDE) first opens you will see a picture similar to the one below:

Let’s take a look around the interface and examine the various features. At the very top is the menu, and directly below that the toolbars. Although the menu is fixed, the toolbars are dockable and can be placed in various locations in the main window frame. In the upper left corner is the project window, which provides two different views of the project, the file view and the type view. To the right of that is the editor area which is an MDI area. Multiple source code and other document windows can be opened in this area. If they are maximized they can still easily be reached by clicking on the tab at the bottom of the area that represents the desired window (this will be seen later). Below that is the output panel, which contains the various output areas as separate tab regions within the same area. This panel is where the results of a compilation or the running of a program can be found. In the middle there are the Watch and Call Stack panels. On the left is the variable and object Watch panel. Unlike many common watch windows, this one always shows all of the variables for the current function once the variables have been declared in the flow of the program. The Me tab is provided so that the object passed to an event procedure can be examined easily (it does not need to be called Me in the function declaration). The last panel we see is the Call Stack panel. This panel shows the current state of the program in reverse order. In other words, if the program started in the main() function, and then called the init() function, which called the init_databases() function and we stopped execution within the last function then the Call Stack panel would show the three functions in the reverse order that we called them. Also, the Watch panel would contain the current state of the variables in the init_databases() function. If we then clicked on one of the earlier functions, the Watch window would then show us the state of the variables in that function.
The IDE is a very flexible environment and it is easily adapted to look the way any one person wishes to work. Panels can be turned on or off, they can be resized and rearranged. The toolbars can also be moved, undocked an arranged in a different manner that may better suit the user.
Now that we have had a look around we will, in the next section, build our first project, a very basic program that is designed to teach us more about the development environment.
Creating Our First Project
To create a new Superbase NG project, select the New Project from the File menu. At that point, the following window will be shown:
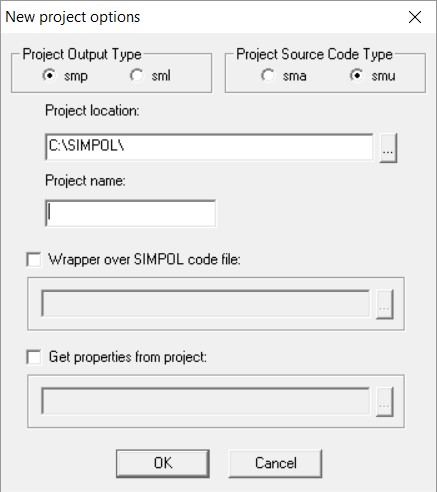
In this window we define the project name, project output type (sml or smp), source code file type (sma or smu), where the project should be located and what it should be called. The options in the lower half of the window are advanced options that we won’t cover at this time. In this example we will select the smp and sma options. The sml option is for producing compiled libraries of types and/or functions for use by yourself and others. The smu extension is for creating Unicode source files rather than ANSI ones. In the following examples we will only use the ANSI source file types. Unicode can be very useful when working with characters from multiple code pages, such as mixing Greek and western European languages, but is not available when working with Windows 9x and is therefore not appropriate as the standard type for source files when supporting all platforms.
For the purposes of our first example, select the smp and sma options. Now click on the … button next to the Project location box. Beneath the Projects directory if no directory called “tutorial” is present then please create one using the Make New Folder. Once a tutorial directory exists below the Projects directory, select it and click on the OK button. In the Project name box enter learn01. Do not add any extension to this, the resulting program will be called learn01.smp, the main source file learn01.sma and the project directory learn01. See the picture below for details:

Clicking on the OK button will create a new project with the name “learn01”. The project will be opened, the main source file will be created, and the result will look something like the picture below:
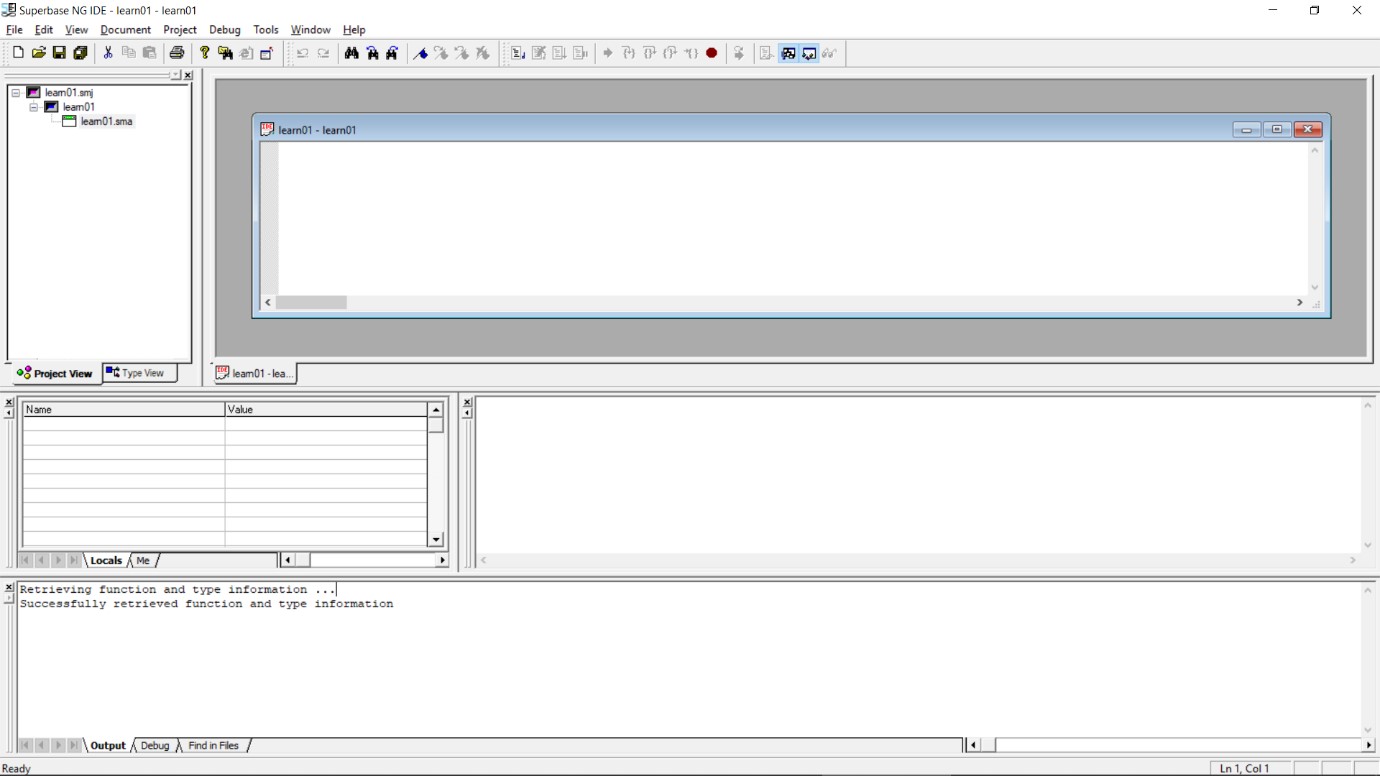
Now that we have a project we can start writing the program code.
Writing Our First Program
The first program will be a very easy one with very little real purpose beyond demonstrating various capabilities of the development environment. Although the “Hello World” program is quite traditional, for this example we have chosen to create a program that outputs the current date and time. This has the necessary flexibility that is required for our demonstration. The source code in its entirety is shown below:
function main()
     datetime dt
     dt =@ datetime.new()
     dt.setnow()
     string s
     s = .tostr(dt.year(), 10) + "/" + .tostr(dt.month(), 10) + "/" + .tostr(dt.dayinmonth(), 10) + \
         "  " +.tostr(dt.hours(), 10) + ":" + .tostr(dt.minutes(), 10) + ":" + .tostr(dt.seconds, 10)
end function s
Please type the program in, don’t copy it from this document. The process of entering the source code will demonstrate a number of the features that we will discuss as we continue.
As you type in the first part of the code, as shown in the following picture, a number of things may occur to you. First, the various words and punctuation in the program appear in different colours. Color-coding of the source code is quite common today and assists the reader in immediately being able to focus on the parts of the program that are of interest as well as visually pointing out when things may have been done incorrectly. Which colors are used for what parts of the programming language are user-configurable. By default, language keywords appear in blue, identifiers in black, strings in red, data types in cyan, operators in magenta, and comments in green.
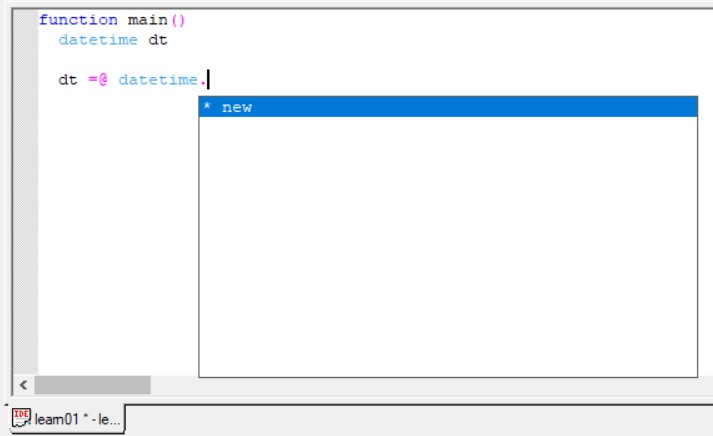
The picture above shows the inline programming help for the datetime type. Since the new() method is the only item in the list, it is already pre-selected. Press the tab key to autocomplete, the highlighted text will be entered at the current cursor position. This feature can greatly reduce the time it takes to write programs, as well as reduce the number of typing errors made.
When typing the open parentheses next to a method name, such as new, the inline help will show the arguments for the call to the method, as seen below
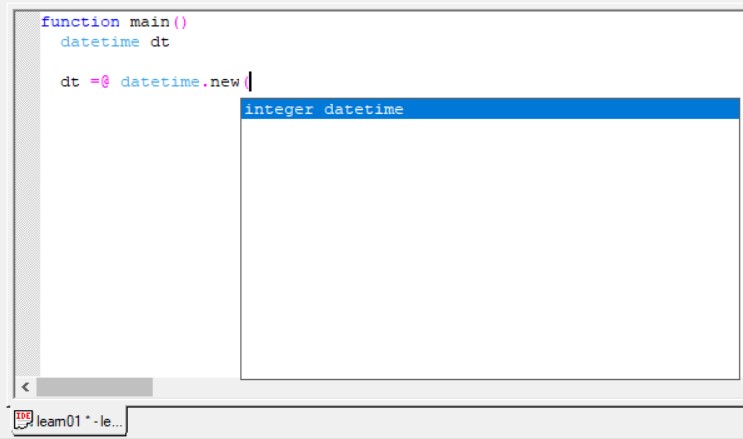

Even when using a variable that is declared to be of the type datetime such as in our program the properties and methods of the object are shown by the inline help while typing the code. To select a different one than the first, just type the first one or two letters until the correct one is selected and then press the tab key to have the rest of the item entered at the cursor position.
Every component in SIMPOL has inline help. In some cases, like that of functions, the help only shows which parameter is current and needs to be filled out as well as information about its data type and possibly the parameter name and default value.
Now enter the remainder of the program as shown in the earlier source code excerpt. Once the entire source code has been entered, it should look like the following picture. At this point we are ready to build and test the project.

Building and Testing Our First Program
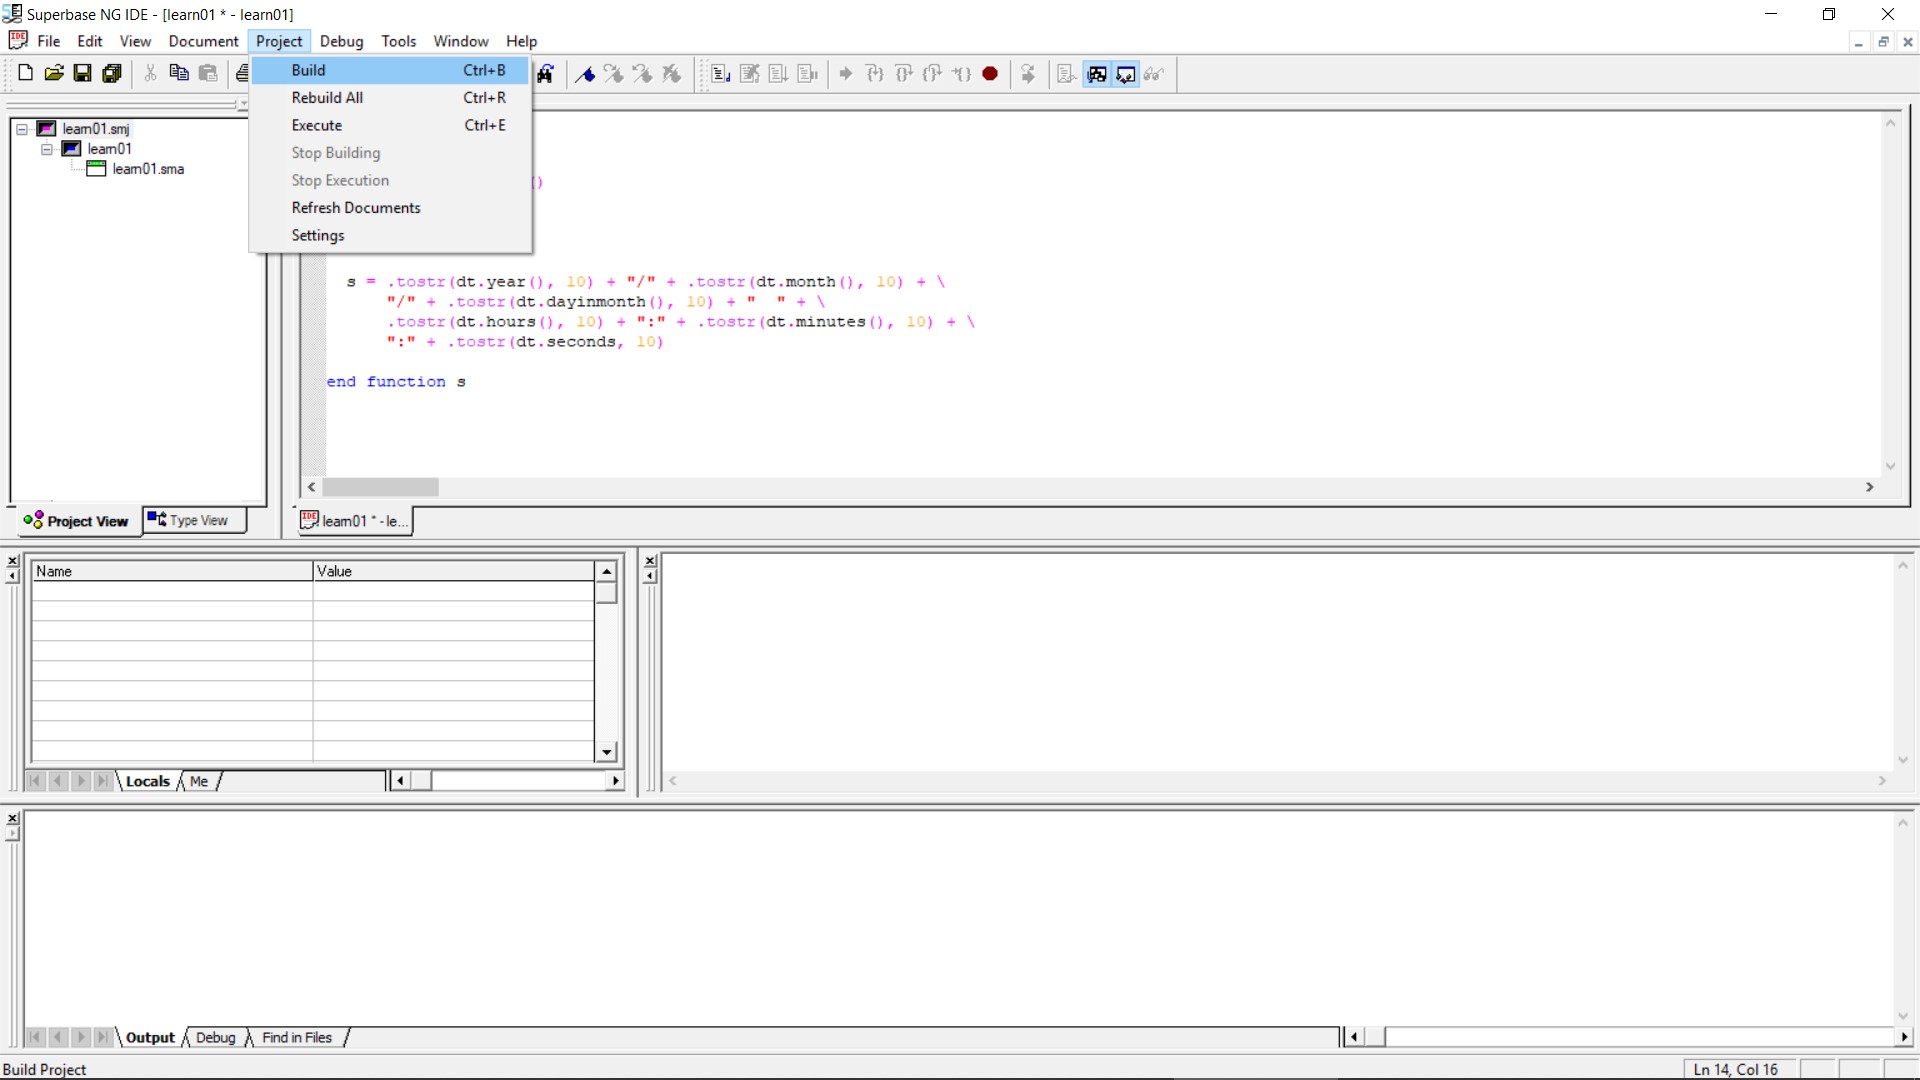
The next step is to compile the program and then we can run it. To build the program, select the Build item from the Project menu as shown below. (Alternatively press Ctrl+B)
The compilation succeeded as can be seen in the output window:
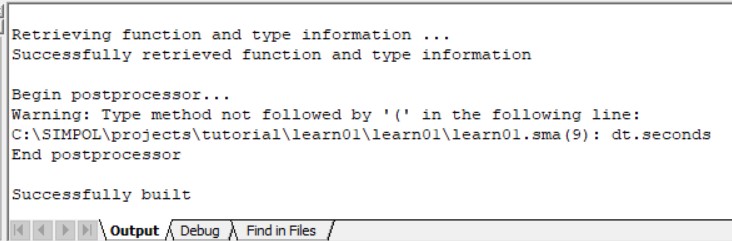
For now we will ignore the warning from the post-processing code, but normally it is a good idea to try and deal with all of the warnings since they can otherwise result in runtime errors in the program. Now we can execute the program by either selecting the Execute item from the Project menu, or else by pressing Ctrl+E. As we can see from the picture below, the program had an error while executing.

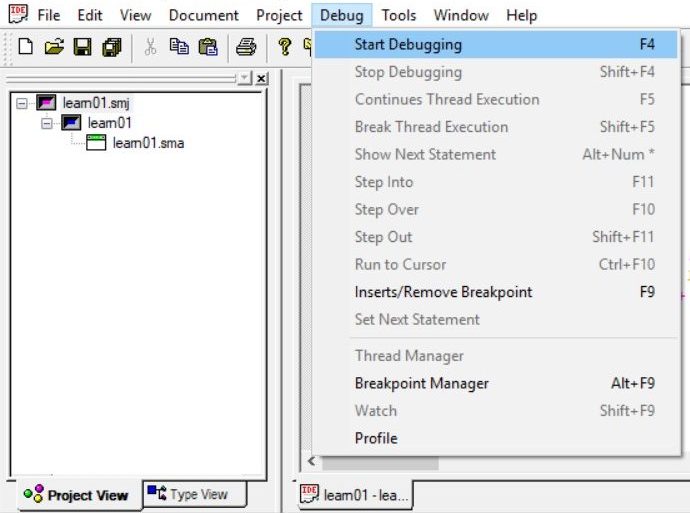
Now that we have had an error, it is time to start up the debugger. Select the item from the menu. This can also be accomplished by pressing the F4 key.
When the debugger starts, it first checks to see if the program has changed since it was last compiled and, if necessary, saves the project (if that is one of the settings) and recompiles the project. Then it initializes SIMPOL, loads and starts the program, and breaks execution on the first statement following the declaration of the main() function, as shown below:
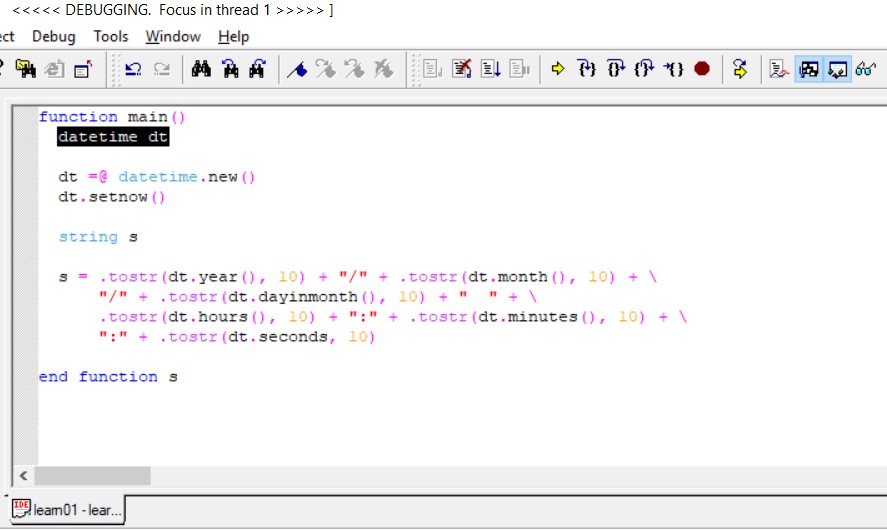
To single step through the code, press F10. We will eventually get to the line shown in the picture below:

Pressing the F10 key once more will result in a pop-up displaying the error message, it should look like this:
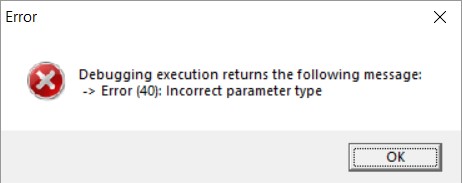
The error number is 40, “Incorrect parameter type”. If we take a closer look at the source code, we can see that the first parameter to the .tostr() in the final segment of the last statement is dt.seconds. The error here is the missing parentheses, since seconds() is a method of the datetime type, not a property. Let’s now change the source code to the correct syntax.
This is done by adding some brackets after dt.seconds the line should now look like this:
s = .tostr(dt.year(), 10) + "/" + .tostr(dt.month(), 10) +"/" + .tostr(dt.dayinmonth(), 10) + \
    "  " +.tostr(dt.hours(), 10) + ":" + .tostr(dt.minutes(), 10) +":" + .tostr(dt.seconds(), 10)
We can now rebuild (Ctrl+B) and execute (Ctrl+E) the program. This time the program runs successfully without errors:
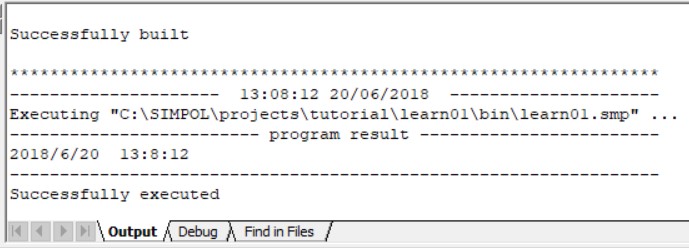
The date and time displayed will of course not be the same
Upon careful examination of the output from the program, however, we can already see that there is still some improvement that can be made over the current version. The program output the string 2018/6/20 13:8:12. Although the date might be considered acceptable, the time is certainly not going to be acceptable in the current format by most people. In the next section we will improve the current program by making incremental improvements and by making use of supplied library functionality that itself was written in SIMPOL.
Making Incremental Improvements
The reason why the initial version of our program, though functional, was not acceptable is that the output was not formatted in a way the user may expect or desire. Part of the reason lies in the fact that to start with, we used the SIMPOL intrinsic function .tostr(). Although this function is quite useful, it is a fairly low-level function and does not provide a wide degree of flexibility when formatting the result. For that reason, early in the development cycle of SIMPOL, additional functions were written using SIMPOL itself to provide that sort of functionality.
There is currently a large and ever-growing library of pre-designed functionality supplied with SIMPOL and in most cases the fully commented source code of the library is also provided. Pre-compiled libraries are located by default in the lib subdirectory of the place where Superbase NG was installed. Projects are normally located in the Projects directory also located directly below the root directory of the installation. The source code for the various supplied libraries can be found in the Libs directory located directly below the Projects directory.
In order to improve the output of the program, we can use the STR() function found in the STR.sml library file. This function includes the ability to format strings in exactly the same ways as those supported by the previous Superbase product, except currently for a lack of support for scientific notation, which will eventually also be supported. To access the functionality in this library, we first need to add it to the project. Select the Settings item from the Project menu.
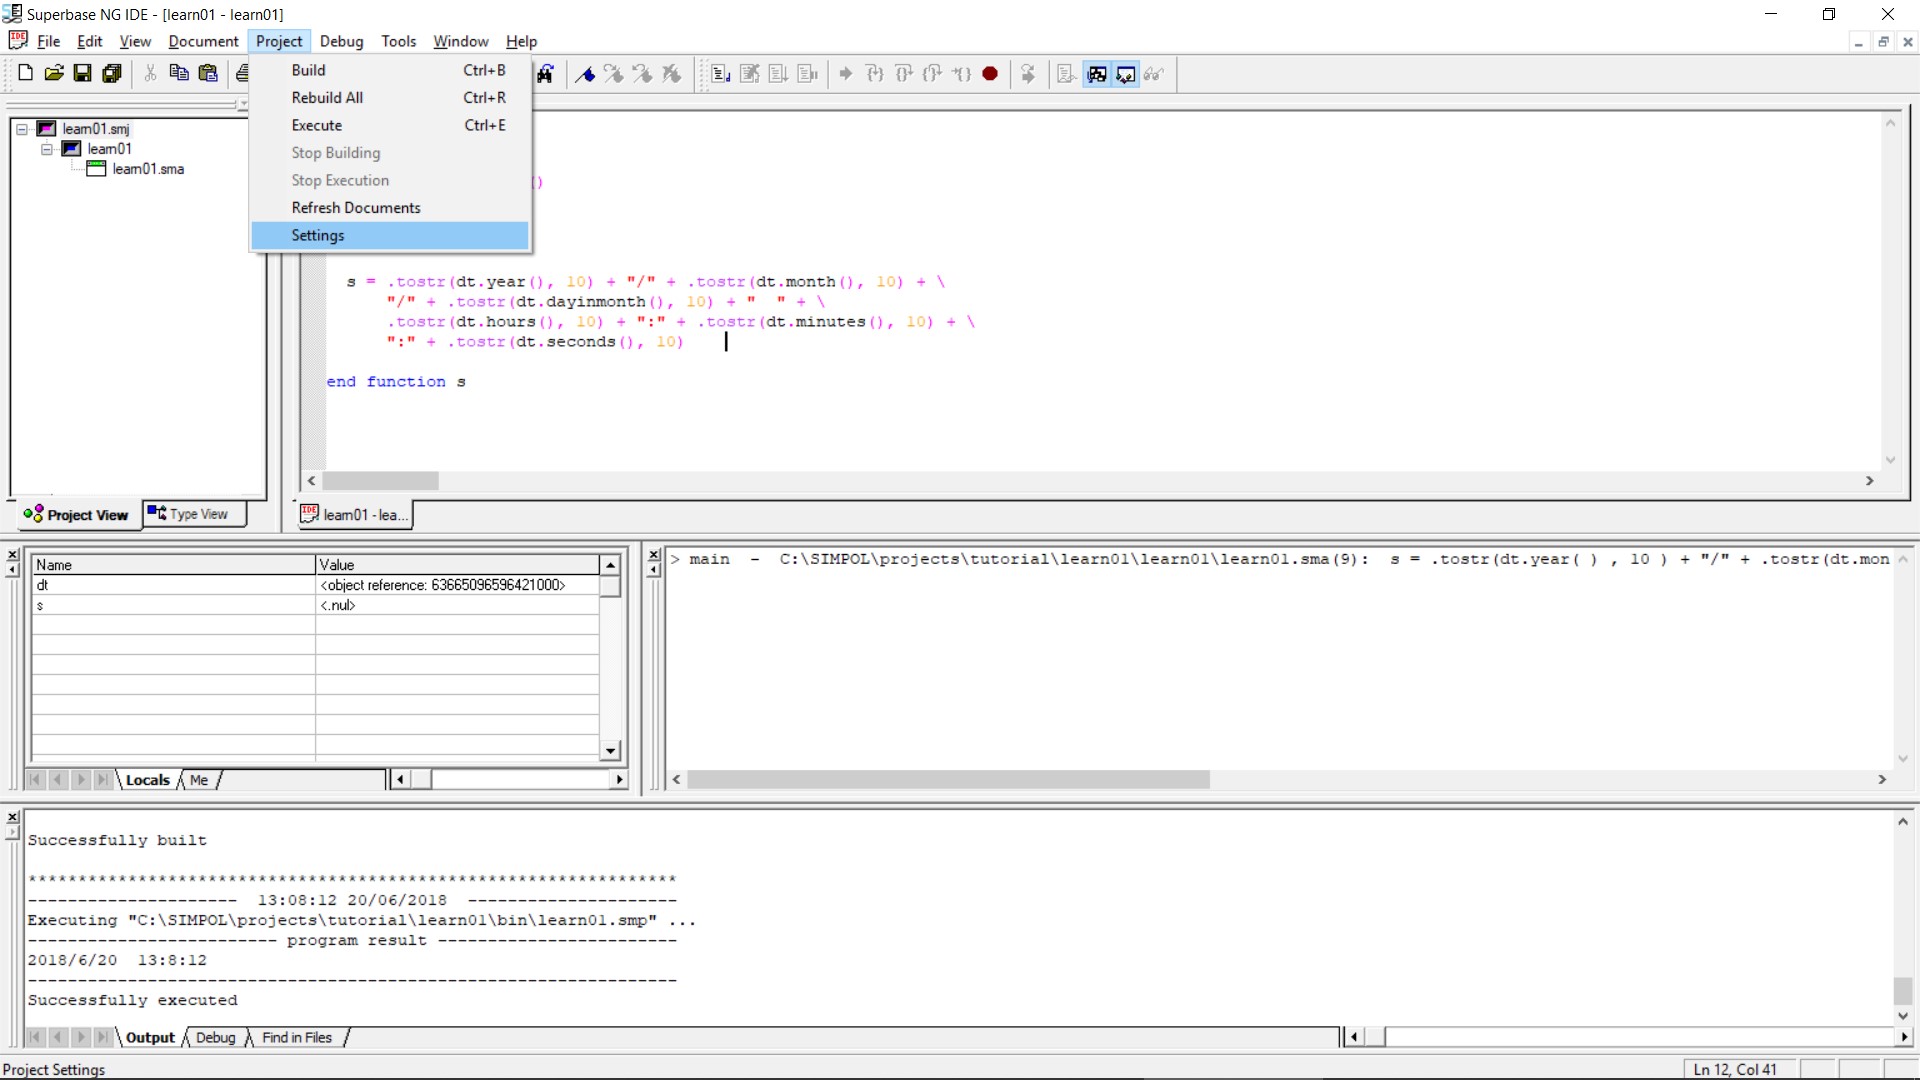
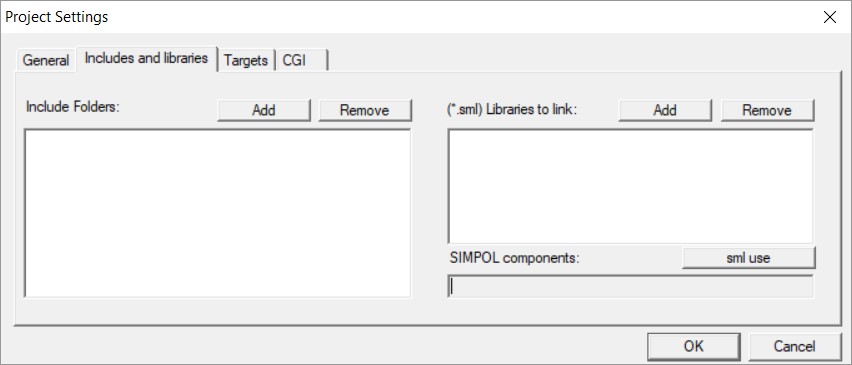
This will display the Project Settings window.
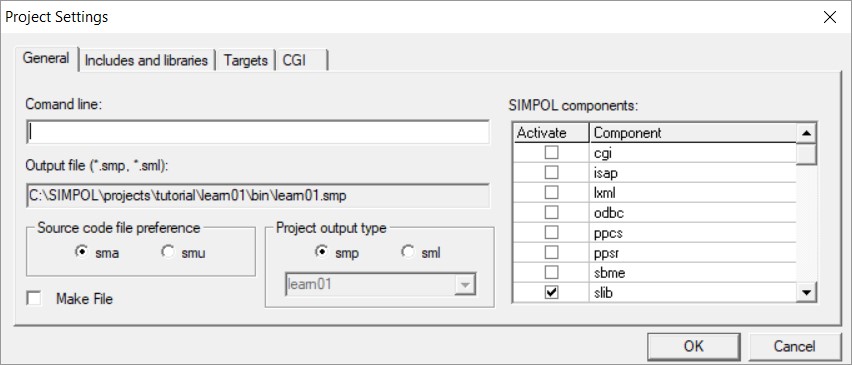
This window is extremely important for creating powerful and successful applications using SIMPOL. The initial tab allows the setting of the source code file preference, assigning of command line parameters when running and debugging in the IDE, and also provides a method of selecting the SIMPOL components required by the project. If a component is required but not selected, then it will not be available at runtime nor will the inline help assistance work for the associated types and functions.
The second tab provides a place to define two important areas, on the left is the place that the include directories are added (where the compiler will look for included source code files during compilation) and on the right is the list of pre-compiled SIMPOL modules (*.sml‘s) that are to be added to the project
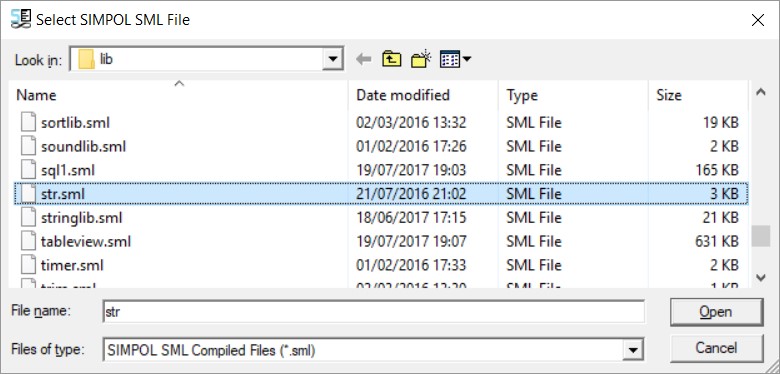
.Click on the button on the right side of the window and from the resulting file selection window, go into the lib directory and select the file STR.sml.
The project settings menu should now look like this

Once the library has been added to the project, we can add a declaration for the type SBLNumSettings, which is necessary in the SIMPOL version of this function because unlike in SBL and other BASIC derivatives, there are no pre-defined global entities such as Superbase.NumericFormat. As can be seen from the following picture, the inline help also supports user-defined objects and functions. In this case the new() has been implemented in such a way as to allow default values for the object which the user can override by passing in other values.

Continue modifying the code until it matches the source code below. We will replace nearly all instances of the function .tostr() with the function STR(). This will give greater flexibility when formatting our numbers.
function main()
     datetime dt
     SBLNumSettings ns
     ns =@ SBLNumSettings.new()
     dt =@ datetime.new()
     dt.setnow()
     string s
     s = .tostr(dt.year(), 10) + "/" + STR(dt.month(), "00") + "/" + \
          STR(dt.dayinmonth(), "00", ns) + "  " + STR(dt.hours(), "00", ns) + \         ":" + STR(dt.minutes(), "00", ns) + ":" + STR(dt.seconds(), "00", ns)
end function s
Notice the use of the forward slash (\) in order to carry on a declaration over a line
Now we can rebuild the project by pressing Ctrl+B. Assuming that no typing mistakes were made and that it builds successfully, pressing Ctrl+E should successfully run the program and show the results in the output window, which should look something like the following (obviously the actual date and time will differ).
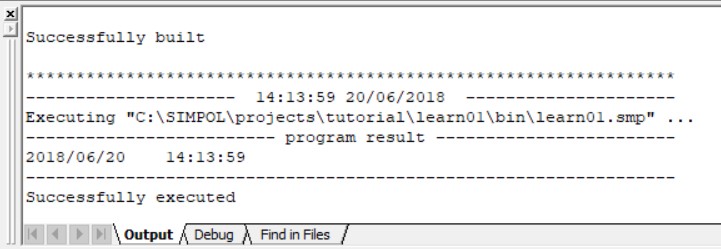
This time around the result looks much more reasonable than the earlier version. This solution still leaves some open issues, such as dealing with date formats that use the name or the abbreviation of the month and the am/pm style of time. The solution to this is to use more appropriate functions for the formatting of the date and time. As it turns out, just as there is a STR.sml there is also a library called SBLDateLib.sml and another called SBLTimeLib.sml, both of which were written in SIMPOL and for which the source code is provided. These libraries are intended to be directly compatible with the older SBL functionality and they contain functions that are in all capital letters, such as DATESTR(), MONTHSTR(), TIMESTR(), and others. As the development of SIMPOL progressed we created numerous libraries that reproduce the functionality from SBL as well as producing more modern versions of some functions. For example, one of the functions included is the LTRIM()function. This function is a drop-in replacement for the SBL function of the same name. There is also a function supplied called ltrim(). This function is a bit more sophisticated than the SBL version, in that it not only trims spaces, it also trims tab characters and can be passed a string parameter to optionally trim any character contained within that string so that the user can choose which characters should be trimmable.
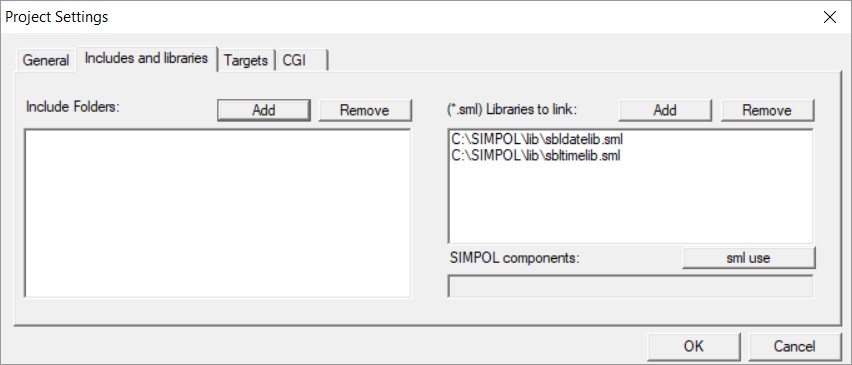
Let’s make some final improvements to the program. Reopen the Project Settings window via the menu and in the Includes and libraries tab remove the STR.sml and select instead the SBLDateLib.sml and SBLTimeLib.sml from the lib directory. The Project Settings window should look like this:
Now modify the source code to make use of these new libraries as follows:
function main()
   datetime dt
   SBLlocaledateinfo ldiLocale
   integer iMicrosecondsinaday

   ldiLocale =@ SBLlocaledateinfo.new()
   iMicrosecondsinaday = 60 * 60 * 24 * 1000000

   dt =@ datetime.new()
   dt.setnow()
   string s s = DATESTR(date.new(dt/iMicrosecondsinaday), "mmmm dd, yyyy", ldiLocale) + \
                " " + TIMESTR(time.new(dt mod iMicrosecondsinaday), "hh:mm:ss.s am")
end function s
Summary
We have learned how to:
- Create a new project in the IDE
- Make use of the inline help
- Build and execute a project
- Debug a project
- Work with SIMPOL libraries (
*.sml)
In the next part we will take our current project and learn how to modify it to output the results in a web page as a web server application.