
Quick Report Designer
The Quick Report component is provided for the creation, modification, saving, loading, and execution of ad-hoc reports. The query engine uses a subset of SQL92 as its query language, it removes the need to learn SQL92 so that it is quick and easy to create a report. The resulting report can be stored for later use, and the output can be directed to a print preview window, directly to the printer, the clipboard, CSV file, or HTML file. More targets are planned.
Getting Started
When it is started (this can be done by pressing F5 as well as navigating to Data → Quick Report..., the Quick Report window looks like this
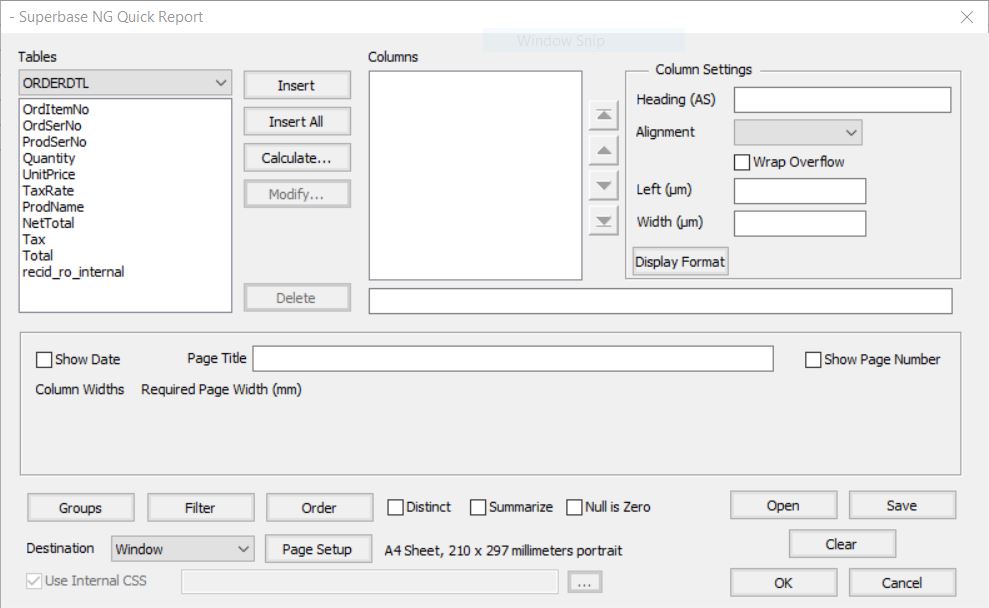
A quick report consist of the following components: the selected columns, the filter or where clause, the order clause, any group definitions, and aggregate calculations at the group or report level. The formatting of the report when printed is fairly basic. The HTML output can be manipulated by CSS but comes with a built-in style sheet if no other is specified
The clipboard target and the CSV target both ignore any grouping or aggregate calculations. The clipboard copies only the data, using a tab-delimited, carriage return/linefeed-delimited format. The CSV format is the better choice for transferring data if it contains tab character or carriage return/line feed characters. CSV uses the column names as the field names in the first row of output.
Adding Columns
To allow you to easily use the various examples in this section, the table we will be using has been included in the distribution. It can be found in the SIMPOL\samples\data directory.
The first step when creating a query is to add the columns that should be output.

Sizing Columns
The next step is to widen or narrow the columns as required. This can be done by dragging the dividers or by specifying the width in the Column Settings. If the required page width exceeds the current paper width the text will change colour to red and become bold.
Setting Remaining Options
At this point, the report can already be run, but depending on the target it may be worth setting some additional options. Such as giving the report a title and showing page number and date. Here is also where an external style sheet can be specified for HTML outputs
Running the Report
A progress bar will appear as the report is running and the following will appear in the print preview window.
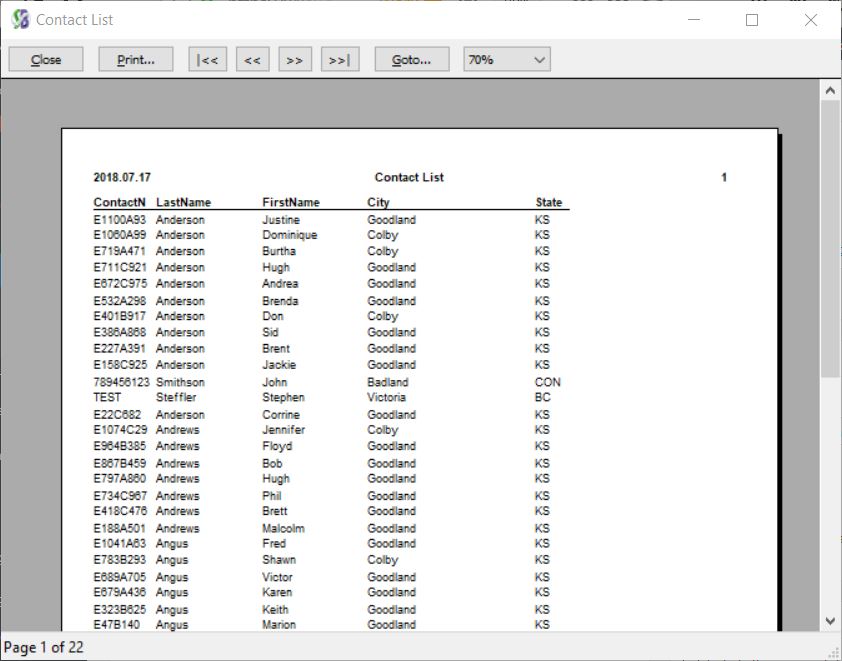
The records will not be any apparent order as the report order was not defined.
Adding a Sort Order
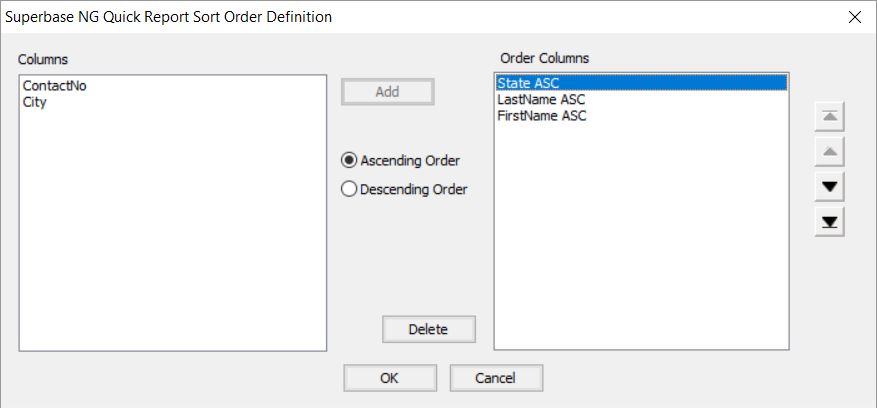
The Order button will open up the Sort Order Definition window, to begin with, no sort order is defined.
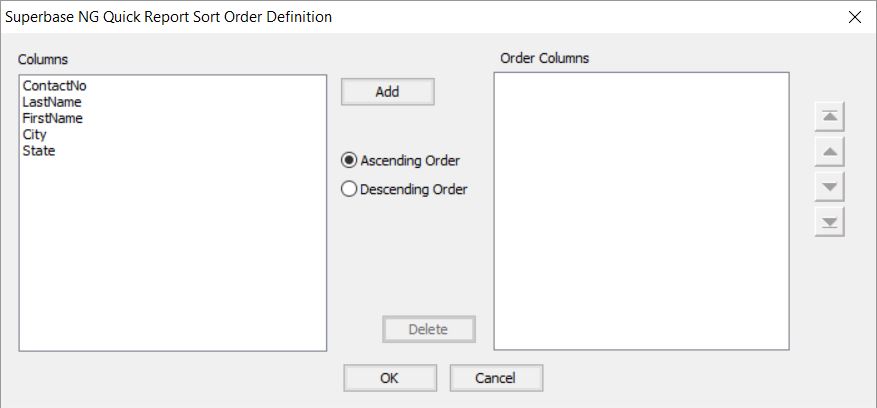
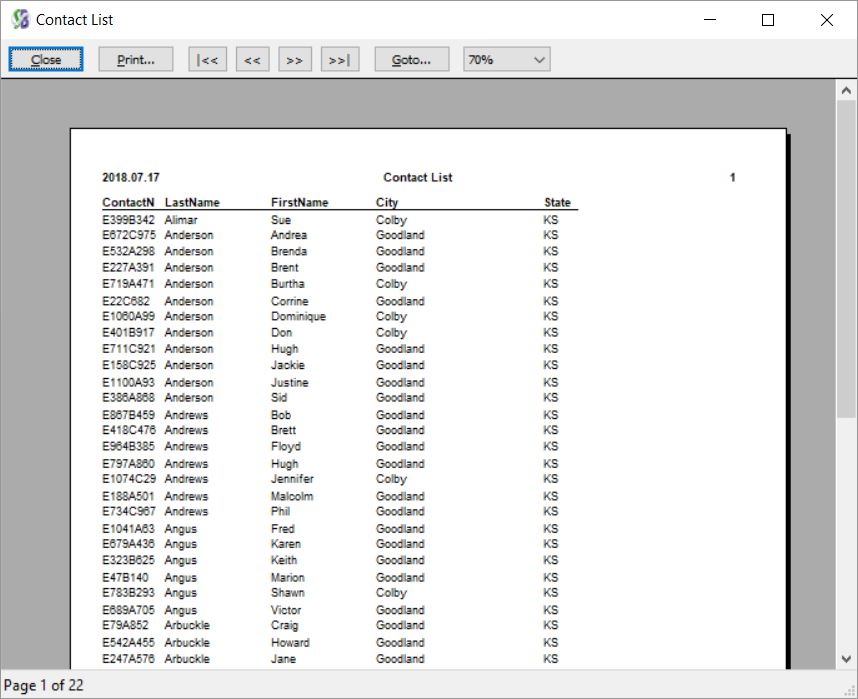
The engine only supports sorting on the output columns, to make our result more useful we will sort by the last name in ascending order. To add secondary or tertiary sorting, sorting by the last name, and then by the first name within those groups of the last name simply add that to the order columns. The report should now look like this:
We can, however, organize this report even better
Groups and Aggregate Calculations
One way to organize the output of the report is by using groups. Groups also have the restriction that it is only possible to group data that is part of the report. In our example we will group by state, within these groupings we can still sort by last and first name.
The Group Definition window is shown below:
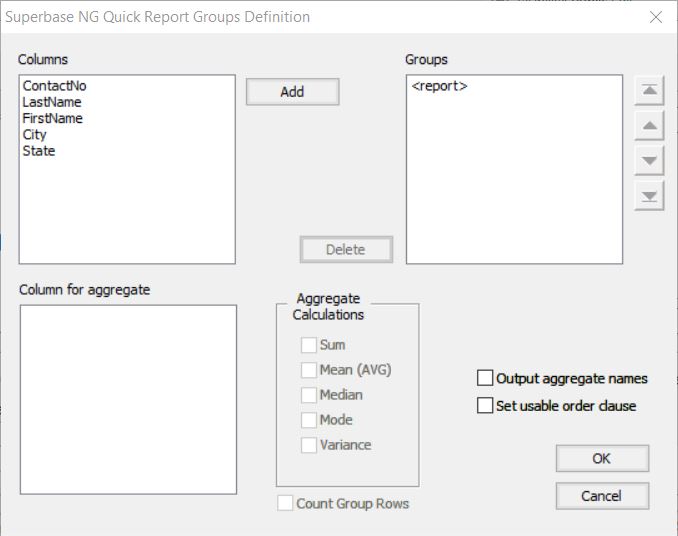
At the moment there is only one group, which represents the report itself. Adding the State column to the Groups list will not change much, we can now check the Count Group Rows entry. Do this for both the State group and the entire report. This counts the rows in each group plus the total number of rows in the report
| Note | |
| To create aggregate calculations for the group or report, assuming that the report contains numeric columns, click on the entry in the Column for an aggregate list. That will enable the items in the Aggregate Calculations box. Select the calculations that you want. If column 1 in the report does not contain an aggregate calculation, then clicking on the Output aggregate names checkbox will ensure that the name of the relevant aggregate calculation will be output in column 1 in both the after group and after report sections. |
We now need to add this State grouping to the sort order. There is a button to do this, but that would have overwritten our current one. We also need to move the State entry to the top, this is done by clicking on it in the Order Columns list and moving it up using the navigation arrows
This will then output a far more useful report grouped into states, sorted by the last name and then by the first name, if required.
Output to HTML
Outputting our results to HTML is as easy as selecting HTML as the destination and entering a name for the output file.
Limiting the Results Using a Filter
In many cases, you may only want to see a portion of the data. In SQL92 to limit the results, we use a where clause. This in our case is equivalent to using a Filter.
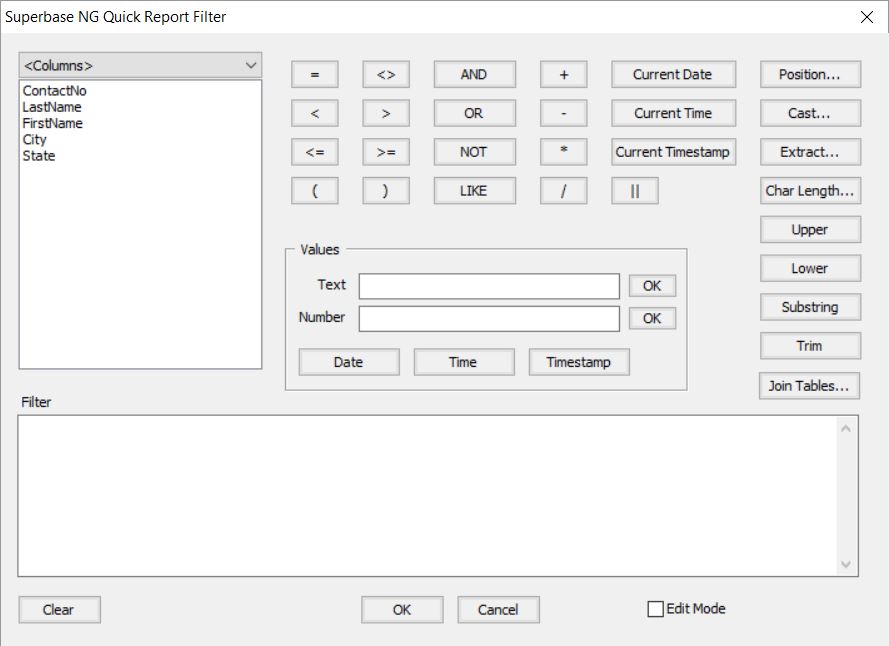
The filter can be defined using either the columns from the reports select clause or any of the fields from the tables that are part of the query. In the case of this data, the ZIP code is not directly associated with a state. To associate these we will switch the column selection from <columns> to CONTACT this allows us to select ZIP entry. The completed filter should look like this:
CONTACT."ZIP" LIKE '9_2%'
The LIKE operator is used here because we wish to use pattern matching on a piece of text. In SIMPOL the replacement of a single character is the _ (underscore) and the wild card character is % (per cent).
If you wish to edit the filter directly, Edit Mode will allow you to do that.
| Tip | |
| Hovering the mouse over any of the function buttons in the far right column will show the syntax of the specific function. Also, when using these buttons, more strict manipulation of the interface will occur, to assist with the creation of the formula. |
The report should now look like this
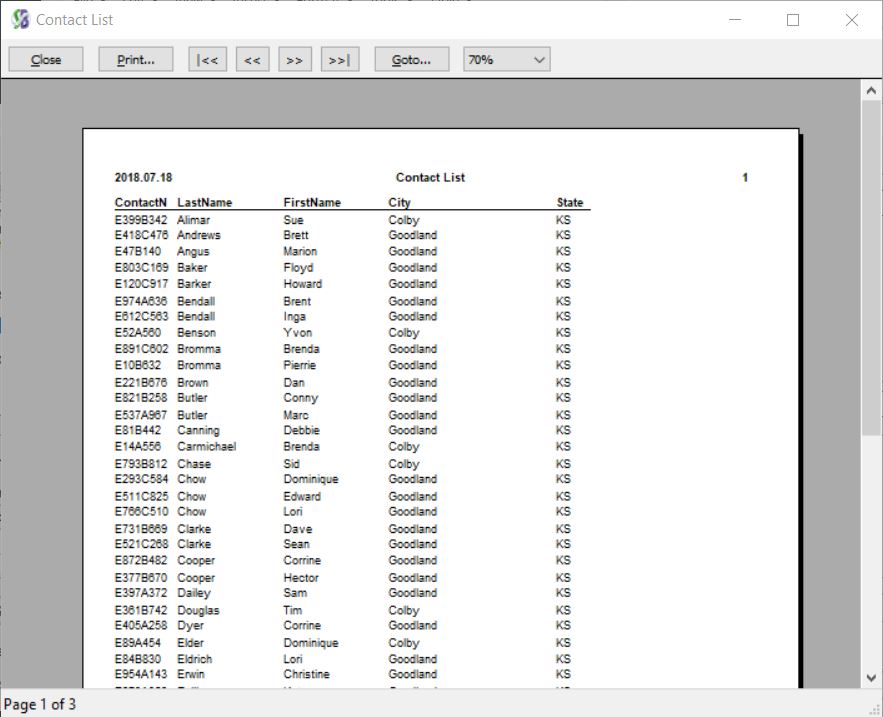
This report has gone from 18 pages to just 3 and in the ZIP column, all the zip codes fit the pattern.
This has only been an introduction to the Quick Report tool, to get to know the full functionality it is best to just play with it and try things out.
Advanced Info
Quick reports can be saved and loaded from a program and the filter can be set at runtime and before executing the report, this allows this tool to build pieces of a packaged application.
Full SQL92 Syntax supported is:
- [TABLE_NAME.]COLUMN_NAME, [TABLE_NAME.]COLUMN_NAME AS
- AND OR NOT
- = > < >= <= <>
- [NOT] LIKE ” ESCAPE
- unary +, unary -, +, -, *, /, || (string concatenation)
- POSITION( <string> IN <string> )
- EXTRACT( YEAR | MONTH | DAY | HOUR | MINUTE | SECOND FROM <date-time-or-datetime>)
- CHAR[ACTER]_LENGTH( <string> )
- UPPER( <string> )
- LOWER( <string> )
- SUBSTRING( <string> FROM <start-position> [ FOR <length> ] )
- TRIM( [ [ LEADING | TRAILING | BOTH ] [ <trim-char> ] FROM ] <string-to-trim> )
- CAST( <value-expression> AS <data-type> )
- ABS( <numeric-expression> )
- CURRENT_DATE
- CURRENT_TIME
- CURRENT_TIMESTAMP
When working with dates, times and datetimes:
- Dates must be supplied in the format yyyy-mm-dd when evaluating
- Time must be supplied in the format hh:mm:ss[.ssssss]
- Datetimes must be supplied in the format yyyy-mm-dd hh:mm:ss[.ssssss]
To evaluate a date, time, or datetime it needs to be prefaced with the appropriate operator (DATE, TIME TIMESTAMP)
To escape a single quote mark (‘) use another single-quote mark
The following keywords are supported: AND, ABS, AS, BOTH, CAST, CHAR_LENGTH, CHARACTER_LENGTH, CURRENT_DATE, CURRENT_TIME, CURRENT_TIMESTAMP, DATE, DAY, ESCAPE, EXTRACT, FOR, FROM, HOUR, IN, LEADING, LIKE, LOWER, MINUTE, MONTH, NOT, OR, POSITION, SECOND, SUBSTRING, TIME, TIMESTAMP, TRIM, TRAILING, UPPER, YEAR.