
This is the second of a three-part tutorial concerning making a program which uses the IO functionalities of SIMPOL to create an application. This application should take as an input a specifically formatted text file and return how much time was spent working on a specific task. In the first part of this, we created a simple application that would accomplish the task we set out to achieve.
However, to use this program we would either need to launch it from the IDE itself or using a complicated command, neither of which makes a particularly pleasant user experience. In this second part of the tutorial, we are going to create a UI program that will allow us to find the file we which to use and then execute the program we previously created.
There are two* ways to make a UI element in SIMPOl: using the Superbase NG Personal Form Editor, and saving it as a .sxf file that can be read by our IDE, or of course, writing out the UI element by element in long-form, but this is generally unnecessary and takes much longer to achieve the same results. We will be taking the first approach and creating the form first in the Form Editor, saving it in a readable format, and writing some additional functions to ensure the program works how we want it to.
This is an intermediate use of the wxWidget component of SIMPOL, for a more basic introduction, there is a chapter in the Programmer’s Guide dedicated to this (found here as well as included in your installation) as well as a basic introduction to Dialog style programs (found here). This program will not go into significant depth into the wxWidget library, but it is often useful to have a basic understanding of what you are doing, and it is thus highly encouraged that you read through at least one of these, if not both, before attempting anything more advanced.
*there are three, but the third is a mix of the previous two and is well above this tutorials skill ceiling
Creating our Project
Before we can start using the form designer to create a UI it is a good idea to create a blank project in a logical place, this will give us a place to save our form files that we are going to make in the next step
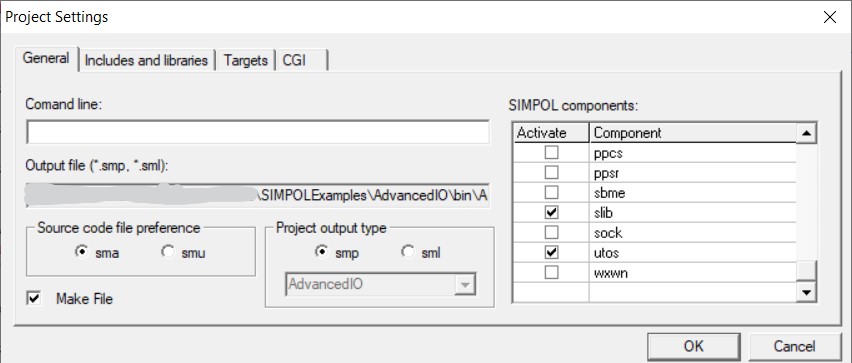
Once we have created our new project we need to activate the wxWidgets components, this can be found in Project Settings in the SIMPOL components menu (seen below)
That is all we are doing in the IDE for now although we will of course come back to this later on.
Creating the Form in NG Personal
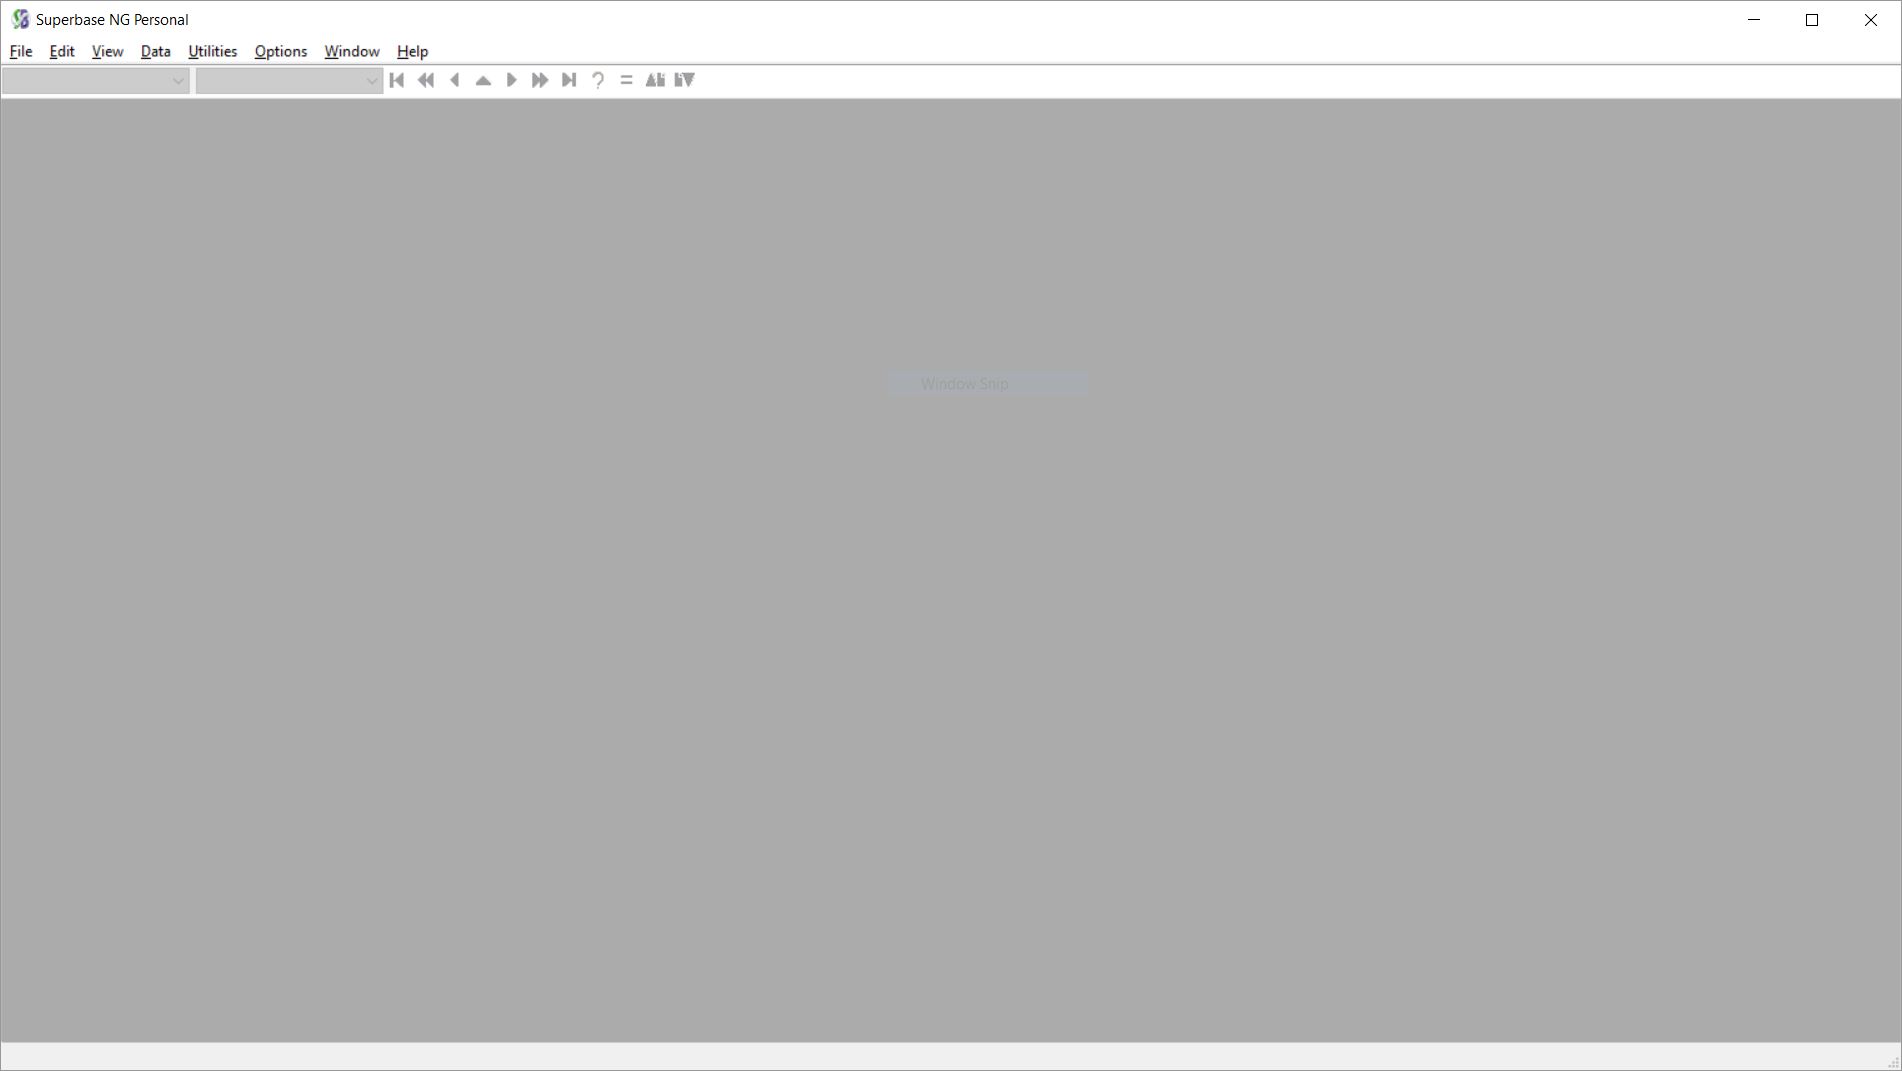
Once you have launched the Superbase NG Personal you will be met with the following screen
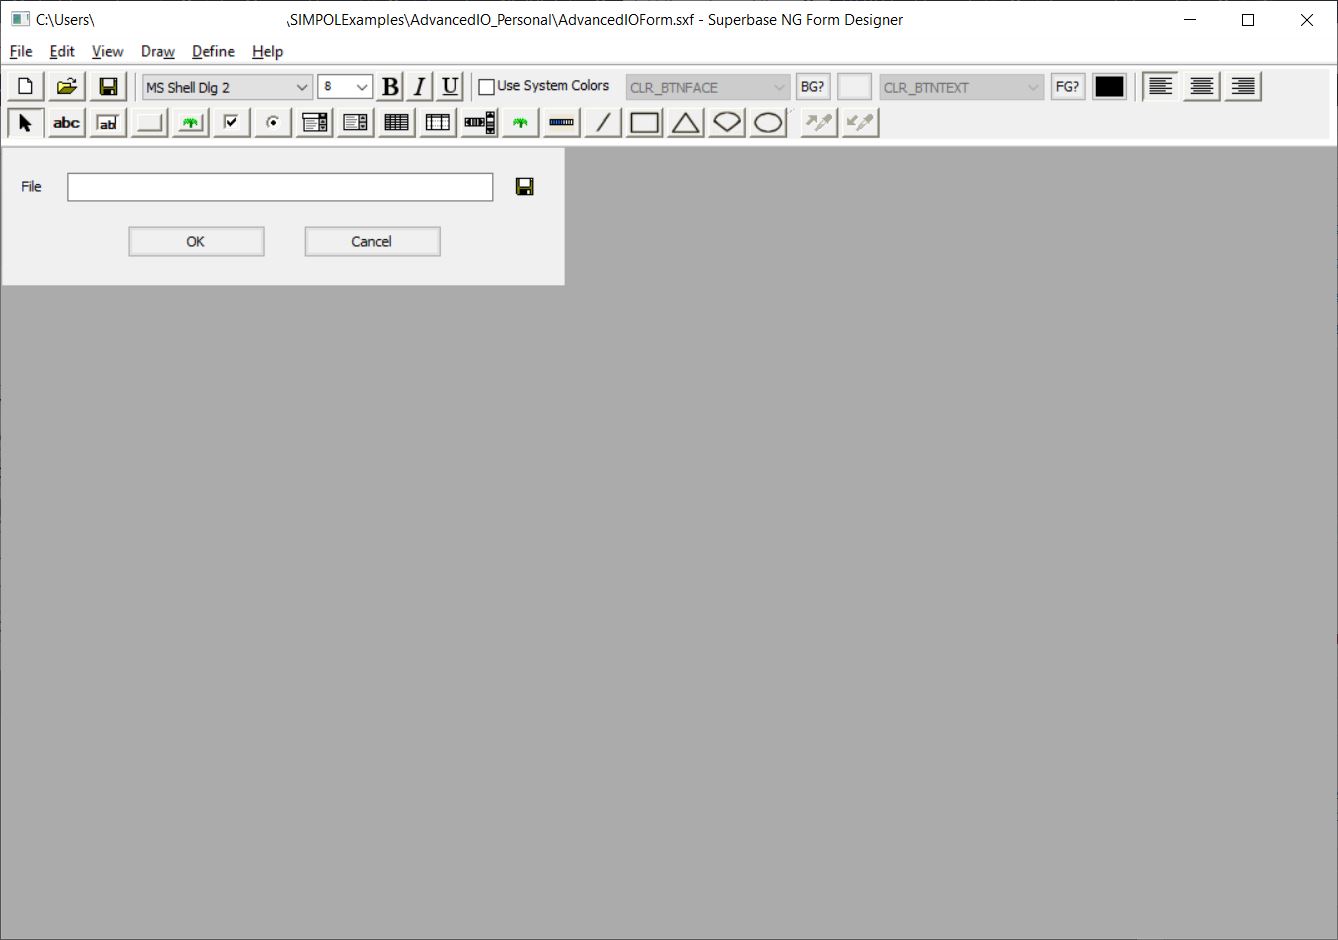
From here you want to create a new form (New -> Form...) This will create a new window with a page on it, you should at this point save the form something sensible.
N.B. It is not necessary to save .sxf files in the same folder as your project as often (as in this case) we will later need to export it as a .sma to use it in the program.
Once you have saved the form something sensible you want to change the size of the page, in the example provided we have made the window a 450 wide by 110 tall box, this is of course up to personal preference and taste. To access the Form and Page Properties window, simply double click a blank part of the page. The following dialogue box should pop up here you can change the Form and Page Name as well as the colour of the form, although it is best to use a System Colour for more cross-platform consistency

Once we have done this we can start to draw things onto the page, the end result should look something like this:
The version you will create has a different background colour, but that is just a slight cosmetic change
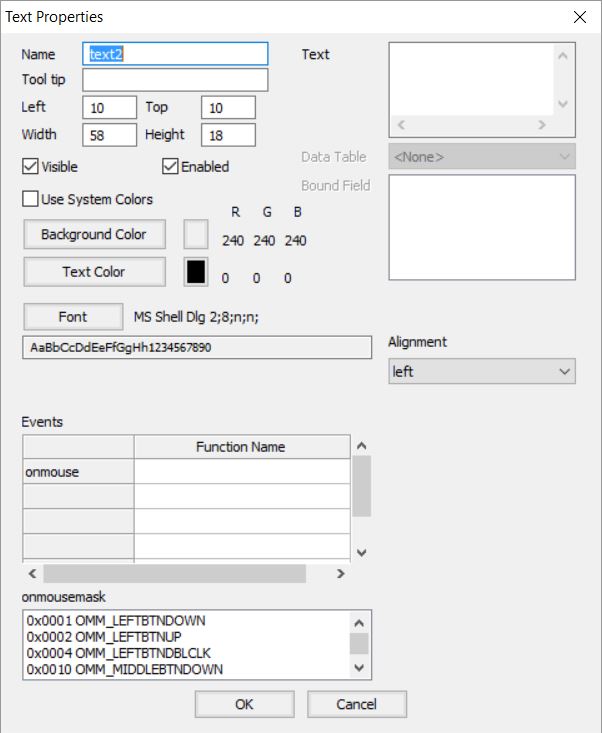
The first thing we will be adding to our page is the text that reads “File”, this is very easy just select “Draw a label” and draw it roughly where you want to position it. This will open the Text Properties dialogue (below) now all you need to do is write your text you want to display in the Text box as well as change the name to lFile (more about the control naming convention here)
Press OK
Your window should now look something like this

This is clearly not right, the text has been coloured incorrectly, to correct this double click on the text you just made to bring up the Text Properties dialogue again, to correct the off-colour tick “Use System Colors” and then change the background colour to “CLR_WINDOW“
Once this is done the text should now look consistent with the rest of the window.
Next we need to add the Editable Text Box, two buttons for OK and Cancel as well as the
Once this is done we can add the Editable Text box, the exact positioning and sizing does not matter yet as we are going to be resizing and aligning these later anyway
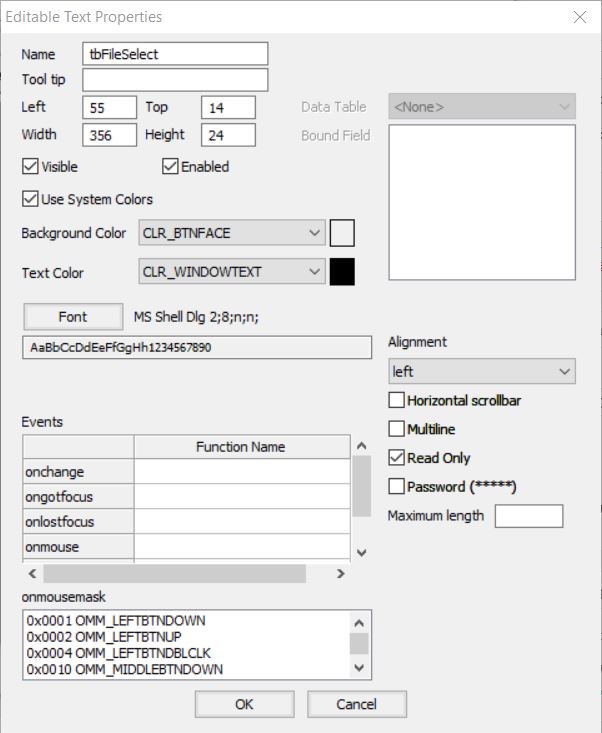
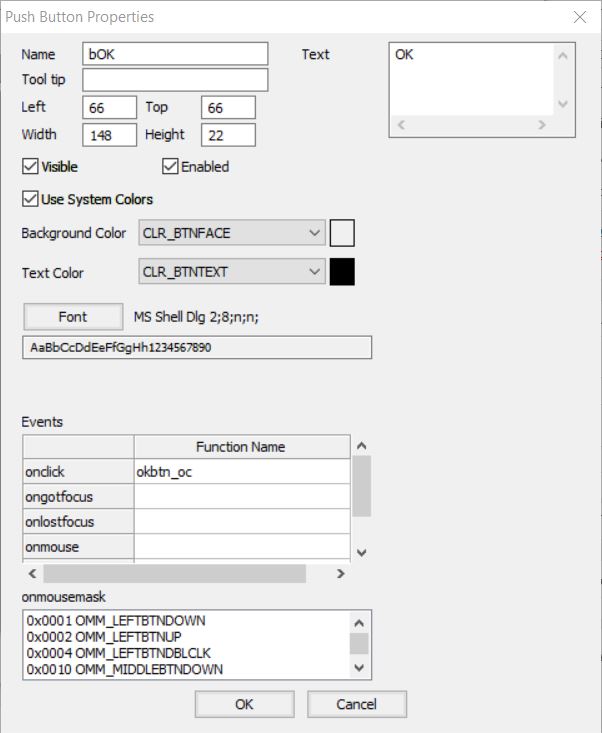
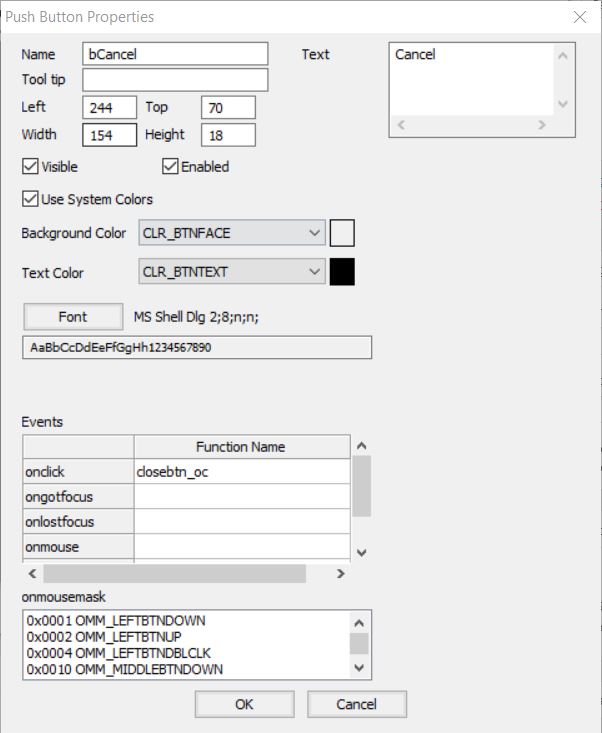
The next thing we want to add is three buttons: two text buttons for OK and Cancel (call this bOK and bCancel) as well as a bitmap button to which we will add an icon (call this bbFileSelect). Previously we have not needed the user to interact with what we have created, however, for the buttons we want an action to occur when the end-user clicks on the button. This is where Events come in, these are how SIMPOL allows a user to interact with UI, when an event is triggered (such as when a user clicks on a button) that can call a function, this allows us to act upon a user’s interactions with the form. We will only be using onclick for now but for each of the buttons, we want to create a sensible function name.
N.B. It is good practice here to create function names which describe what the object being interact with is and what action has occurred. For example, we will name our onclick function for our OK button “okbtn_oc“
Now you can fill in the rest of the buttons as follows
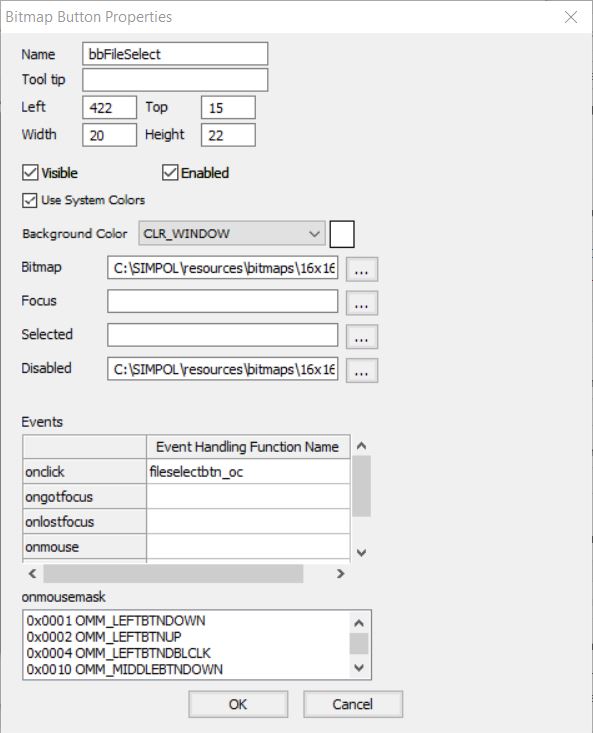
For the file selection button, the bitmap files can be found under C:\SIMPOL\resources\bitmaps, we are using the 16×16 save icon, and 16×16 save_disabled pictures respectively.
At this point we are ready to finalise the interface for this GUI, this is a personal preference, however, several things should be considered:
- Ensure the OK and Cancel buttons are the same size as well as horizontally aligned with each other
- The Editable text box should be large enough to contain the whole filename
- The two text boxes and the file open button should all be aligned horizontally
At this point your version should look similar to the one shown above, although evidently this is also down to taste
The last thing we need to do in Personal is File > Save As... > wxform Program... and save it in the project space we created right at the beginning
Making the form run
Adding the form code
To make a graphical program run you will first need to add all the event functions we’ve added to the buttons. For now, we will not flesh these functions out as it is not yet
You should at this point copy over the file we created in the last part into the same location as the form file (if you do not have it on hand, there is a download of everything at the bottom of the page). Now the following code is required:
include "AdvancedIOForm.sma"
function main()
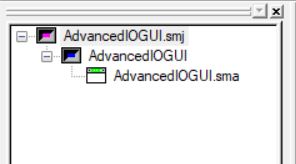
end function ""Now if you save this project the Project Tree should look like the one below (the names of your individual files may vary)
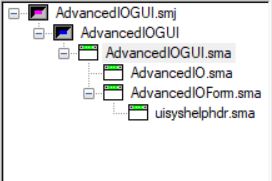
N.B. I have since decided on a more logical layout for this, by putting include "AdvancedIO.sma" into the form code, we will get a more logical layout of things (and the downloadable project will reflect that)
If you don’t see the uisyshelphdr.smathis could be because in the form the include statement has not been included if this is the case add the following to the top of the form source
include "uisyshelphdr.sma"Save the file again, the project tree should now look like the above image.
Adding Event functions
Once this is done we can get down to actually getting the form to run when you execute the program. This is a two-part process, the first of these is completing the form program, and the second is the actual code to create a window and set the form to that window.
We will start by simply adding the event functions. The code for that is very simple
function fileselectbtn_oc(wxformbitmapbutton me)
end function sFilename

function closebtn_oc(wxformbutton me)
end function

function okbtn_oc(wxformbutton me)
end function

function errormsg(string s)
end function
This code will not do anything when an event occurs (a button is pressed) but will allow us to see and use the form. If you now try to execute (CTRL+E) the program, it will fail since we have not yet assigned the form to a window. That is the next stop
Creating a window
In the main function you created earlier (in AdvancedIOGUI.sma in the example version) we will now be creating a dialogue and initialising the form we have just made. To do so we first need to declare the following variables
wxform f
wxdialog d
integer iError
We will then need to initialise these three variables, the first is obvious
ierror = 0We then need to initialise the form we have just made, first doublecheck the name of the function which contains the form, in our case its called IOGUI, and then you need to refer the variable f to the function as follows
f =@ IOGUI(error = iError)This means whenever we refer to the variable f SIMPOL knows we are essentially doing a function call to the form. At this point we want to check if this has worked properly, if it has we want to then create a window and assign the form to that window, otherwise we want to create some sort of error dialogue.
if f =@= .nul-
      errormsg(iError)
   else
      d =@ wxdialog.new(1, 1, innerwidth=f.width, innerheight=f.height, visible=.false, captiontext="Advanced IO GUI Window", error=iError)
      if d =@= .nul
         errormsg(iError)
      else
         f.setcontainer(d)
         //centerdialogonparent(d)
         d.processmodal(.inf)
      end if
   end if
This is slightly more complex but what is happening here is we are checking if f does not refer to a null object, and if it does that means it was not initialised properly and thus an error message displaying the error code should come up. If it has initialised properly, we are then creating a new dialogue with the same width and height of the form whose caption is “Advanced IO GUI Window”
At this point, we also check that this was initialised properly in the same way we just did with the form. Once both of these have been tested we set the forms container to the dialogue we just created and then we make the dialogue window visible using the processmodal function, setting the timeout to .inf which will ensure that unless the user quits the client the window will continue to be visible.
Finally, before we can execute the program we need to change one more thing. Since we have merely copied over our program from the previous part we will need to change the name of the main function, this is because otherwise this program will have two main functions and will accordingly throw an error. Once you rename the function to something sensible, IO, is fine the program will now execute and the form should show up
Finishing the Event functions
It now seems like a good time to make some of the buttons function, we’ll start by making sure that the Cancel button closes the window. The function consists of a single function
function closebtn_oc(wxformbutton me)
   me.form.container.setvisible(.false)
end function
This function is simple but it introduces a new very important concept: recursion, in the sense that this function does a call to itself (me) to set the form invisible.
The next function we need to create we have already referenced twice in the creation of our window, errormsg, that function looks something like this
function errormsg(string s)
   wxmessagedialog(message=s, captiontext="SIMPOL IO Example Error", style="ok", icon="error")
end function
This function is the simplest one we will be creating here, it calls wxmessagedialog which creates a message box dialogue with the error code in it and an OK button to dismiss the dialogue.
An important concept which we need to talk about before we can create the next to functions is the member operator (!) this allows us to, using the name of the button, make reference to a button, in our case we will be using this with our editable text box but the same concept applies. The first of the two functions that require this is a bitmap button
function fileselectbtn_oc(wxformbitmapbutton me)
  string sFilename, sResult, cd

  cd = getcurrentdirectory()
  sFilename = ""
  sResult = ""

  wxfiledialog(.nul,"Open File for Analysis",cd,"", "Text File (*.txt)|*.txt","open,mustexist",sFilename,sResult)
  if sResult == "ok"
      me.form!tbFileSelect.settext(sFilename)
  end if
end function sFilename
This function is more complex, it calls a file dialogue which will then if the user has successfully selected a file change sResult to "ok" and when this occurs we will use the member operator to change the text in the editable text box to the file location. This will later be used as the input for the program we created in the previous part
Running the IO Program
We have only got one function left to write, that is the function that when you click on OK will attempt to take the input file we have just specified and use it as the input for the IO program we wrote in the first part of this tutorial. We renamed the main function of our previous code and will now attempt to execute this code.
function okbtn_oc(wxformbutton me)
  string file
  file = me.form!tbFileSelect.text
  IO(file)
  me.form.container.setvisible(.false)
end function
Again this function shows off member operators and recursion. We declare a string variable, file, which we then set to the text of our editable text box. This should ideally be the location of the text file the user wants to input into the IO function. The next thing we do is call the IO function which will create a text document in the project file containing the split daily times and total time, as it should from the previous part of this tutorial. Finally, we are then setting the form to invisible, thus closing the application.
Follow On
The final part in this tutorial will add more functionality to this program, we will add a window which will display various aspects of the output we are currently getting as a text file to allow for an easier and more complete user experience. Part 3 can be found here, Part 1 here
Full Code
AdvancedIOGUI.sma
include "AdvancedIOForm.sma"

function main()
   //Declaration
   wxform f
   wxdialog d
   integer iError

   //Initialisation
   iError = 0

   f =@ IOGUI(error = iError)
   if f =@= .nul
      errormsg(iError)
   else
      d =@ wxdialog.new(1, 1, innerwidth=f.width, innerheight=f.height, visible=.false, captiontext="Advanced IO GUI Window", error=iError)
      if d =@= .nul
         errormsg(iError)
      else
         f.setcontainer(d)
         //centerdialogonparent(d)
         d.processmodal(.inf)
      end if
   end if
end function ""
AdvancedIO.sma
This is the same as before except for the function name
constant sTIMEFORMAT "0h:mm:ss"

function IO(string sInputfilename)
AdvancedIOForm.sma
// Automatically generated form program file
// Generated by SIMPOL form library
// Requires uisyshelp.sml

include "uisyshelphdr.sma"
include "AdvancedIO.sma"

function IOGUI(integer error)
  wxfont font1
  wxform f
  type(wxformcontrol) fc
  integer e, dpix, dpiy
  number factor
  wxbitmap bmp
  syscolors colors
  sysrgb clrWindow
  sysrgb clrWindowText
  sysrgb clrBtnFace
  sysrgb clrBtnText
  string sFilename, sResult, cd

  sFilename = ""
  sResult = ""
  cd = getcurrentdirectory()
  colors =@ syscolors.new()
  clrWindow =@ colors.getsyscolor(COLOR_WINDOW)
  clrWindowText =@ colors.getsyscolor(COLOR_WINDOWTEXT)
  clrBtnFace =@ colors.getsyscolor(COLOR_BTNFACE)
  clrBtnText =@ colors.getsyscolor(COLOR_BTNTEXT)
  font1 =@ wxfont.new(facename="MS Shell Dlg 2", pointsize=8, style="n", weight="n")

  e = 0
  dpix = 0; dpiy = 0
  getdpivalues(dpix, dpiy)
  factor = dpix / 96
  f =@ wxform.new(width=450 * factor, height=110 * factor, error=e)
  if f =@= .nul
    error = e
  else
    f.setbackgroundrgb(clrBtnFace.value)
    fc =@ f.addcontrol(wxformtext, 16 * factor, 24 * factor, 34 * factor, 14 * factor, \
                       "File", name="lFile", alignment="left", error=e)
    if fc !@= .nul
      fc.setbackgroundrgb(0xf0f0f0)
      fc.settextrgb(0x0)
      fc.setfont(font1)
    end if
    fc =@ f.addcontrol(wxformedittext, 52 * factor, 20 * factor, 341 * factor, 23 * factor, name="tbFileSelect", editstyle="readonly", text="Select Text File",alignment="left", error=e)
    if fc !@= .nul
      fc.setbackgroundrgb(clrWindow.value)
      fc.settextrgb(clrWindowText.value)
      fc.setfont(font1)
    end if
    bmp =@ wxbitmap.new("C:\SIMPOL\resources\bitmaps\16x16_save.png", format="png")
    fc =@ f.addcontrol(wxformbitmapbutton, 404 * factor, 17 * factor, 29, 28, bitmap=bmp, name="bbFileSelect", tooltip="Select a File", error=e)
    if fc !@= .nul
      bmp =@ wxbitmap.new("C:\SIMPOL\resources\bitmaps\16x16_save.png", format="png")
      fc.setbitmaps(selectedbitmap=bmp)
      bmp =@ wxbitmap.new("C:\SIMPOL\resources\bitmaps\16x16_save_disabled.png", format="png")
      fc.setbitmaps(disabledbitmap=bmp)
      bmp =@ wxbitmap.new("C:\SIMPOL\resources\bitmaps\16x16_save.png", format="png")
      fc.setbitmaps(focusbitmap=bmp)
      fc.onclick.function =@ fileselectbtn_oc
      fc.setbackgroundrgb(clrBtnFace.value)
    end if
    fc =@ f.addcontrol(wxformbutton, 100 * factor, 62 * factor, 111 * factor, 26 * factor, "OK", name="bOK", error=e)
    if fc !@= .nul
      fc.onclick.function =@ okbtn_oc
      fc.setbackgroundrgb(clrBtnFace.value)
      fc.settextrgb(clrBtnText.value)
      fc.setfont(font1)
    end if
    fc =@ f.addcontrol(wxformbutton, 241 * factor, 62 * factor, 111 * factor, 26 * factor, "Cancel", name="bCancel", error=e)
    if fc !@= .nul
      fc.onclick.function =@ closebtn_oc
      fc.setbackgroundrgb(clrBtnFace.value)
      fc.settextrgb(clrBtnText.value)
      fc.setfont(font1)
    end if
  end if
end function f

function fileselectbtn_oc(wxformbitmapbutton me)
  string sFilename, sResult, cd

  cd = getcurrentdirectory()
  sFilename = ""
  sResult = ""

  //wxfiledialog bug
  wxfiledialog(.nul,"Open File for Analysis",cd,"", "Text File (*.txt)|*.txt","open,mustexist",sFilename,sResult)
  if sResult == "ok"
      me.form!tbFileSelect.settext(sFilename)
  end if
end function sFilename

//Close working
function closebtn_oc(wxformbutton me)
   me.form.container.setvisible(.false)
end function

function okbtn_oc(wxformbutton me)
  string file
  file = me.form!tbFileSelect.text
  IO(file)
  me.form.container.setvisible(.false)
  //figure out how member operator would work
end function

function errormsg(string s)
   wxmessagedialog(message=s, captiontext="SIMPOL IO Example Error", style="ok", icon="error")
end function