
The Form Designer
The Form Designer is used to create and modify display forms, print forms, and graphic reports. These can be loaded into windows, displayed in dialogues or even inserted into a toolbar. Forms are a powerful way of rapidly creating database-based application programs and for getting user input
The same basic set of tools is used in in the Print Form Designer and Graphic Report Designer these are also incredibly powerful tools and will be covered in detail later.
Getting Started with Display Forms
To start the form designer navigate to File → New → Form... This will open an empty form. As a first step, it is a good idea to make a few decisions about the form being created: colour and size.
In Superbase NG colours on a form can be specified precisely as 24-bit RGB values. Alternatively, they can be specified to use named colours read from the OS each time the program is run. To use named colours you should tick Use System Colors in the toolbar at the top. To set the size of the form you can either double-click the form background or go to File → Page Setup...

For this example, we will make the page 800 by 500 pixels and use system colours
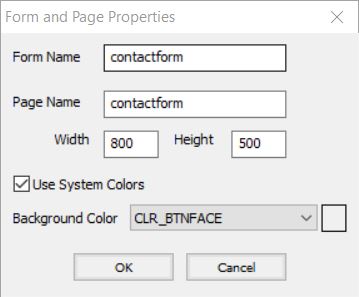
It may seem strange that there are separate form and page names however this is to allow for multiple form pages as part of a single form. This means the form is a container of pages, each of which contains a wxform object.
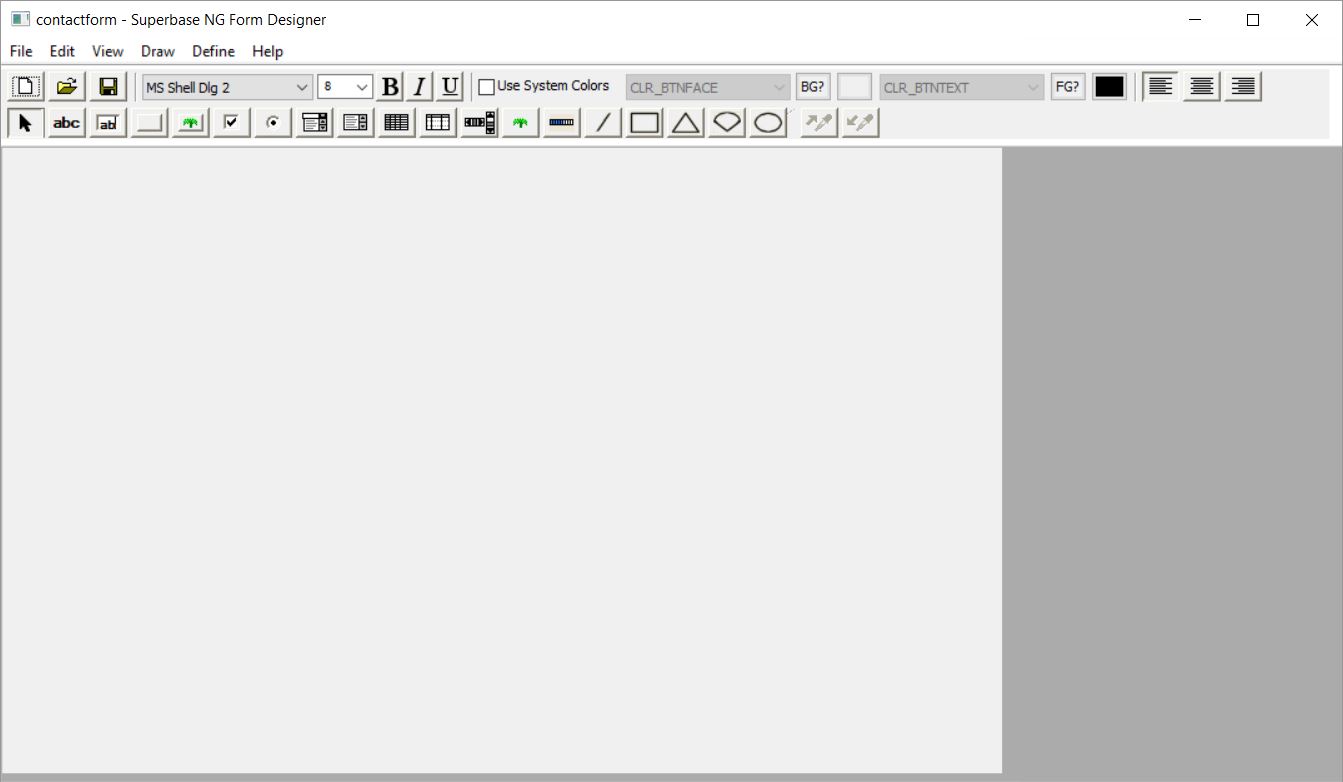
Form Designer Tools
The tools can be divided into two distinct groups: those that create form elements, and those that modify form elements. Hovering over each of the icons in the toolbar will show the tooltip, most of the elements are fairly self-explanatory. The following is a list of the graphical elements which can be placed on the form:
- Text
- Editable text
- Button
- Bitmap button
- Checkbox
- Option button
- Combo box
- List box
- Grid
- Data grid
- Scroll bar
- Image
- Line
- Rectangle
- Triangle
- Arc
- Ellipse
Each of these has specific attributes that affect them. To draw an element select the tool and drag a rectangle on the form, this will represent the size of the object. An item-specific dialogue will then open, here you can fine-tune size and colour as well bind controls to the field, if possible.
Adding a Control
If the Form Designer is open at the same time as a table it can create data-aware forms. To add an edit control bound to a field, create an editable text box. The following dialogue should appear:

Almost everything has already been filled out, most entries are self-explanatory. If you are unclear about any of the items, check their corresponding entry in the SIMPOL Language Reference for the wxWidgets controls.
To bind this text box to a field select the relevant field in Bound Field. If the Create field label is checked, a text control with the appropriate label will be created as well.
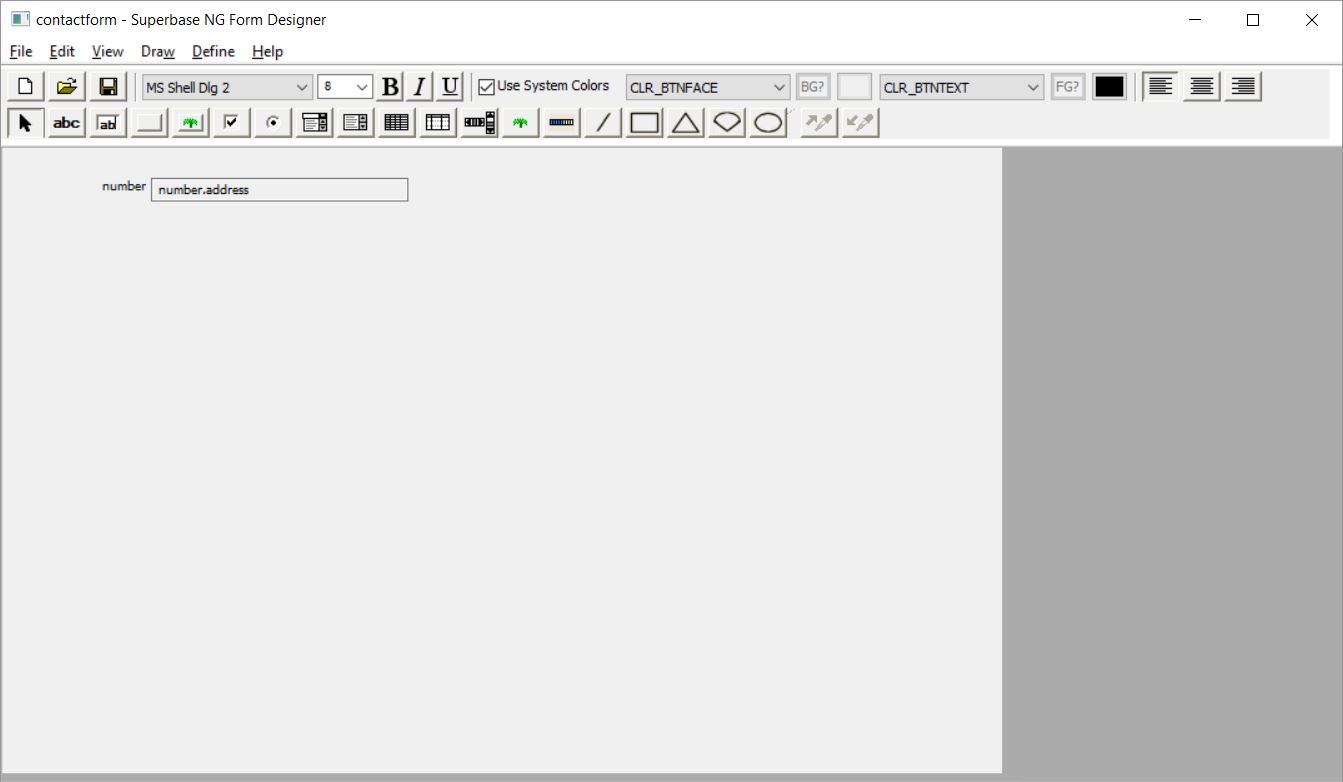
The edit control is not yet readable, to edit the properties of the text box simply double click it. To make this more readable select CLR_WINDOW for the background colour and CLR_WINDOWTEXT for the foreground. The best way to familiarise yourself with the Form Designer is to experiment
| Note | |
If you select multiple fields when creating an editable text control, it will create as many controls as selected (assuming they fit on the form vertically). This is a very fast way to create a group of edit controls and their labels. The names will be created as tb plus the field name to make identification easier. |
More Tools
There is a further set of tools located on the right mouse menu. Most of these are fairly self-explanatory. To align or resize an item first select the relevant operation from the menu, this will bring up a target like a cursor. Now you need to click the control that you want to align yourself to or that is the size you want to resize to
There are some further tools found in the Define menu. File Links is used to link the master table to other tables and also with data grids and detail blocks. Links to tables are always 1:1 links. Links to data grids and detail blocks are called 1:n links. It is possible to have more than one table in a detail data grid
Tab Sequenceof the controls determines the behaviour of controls when stacked on top of each other. The bottommost control has the tab order 1, the next has order 2, etc. If a control lower in the tab order is partly covered by a control higher in the tab order, then the control lower in the tab order will be partly obscured by the control that is higher.
| Important | |
| The wxWidgets tool kit does not specifically define behaviour for controls that overlap. It is a bad idea to try and combine controls in this way, although it is safe to overlay controls on bitmaps and graphics. Graphics: lines, rectangles, triangles, arcs, and ellipses are always below the other form controls. They cannot overlay the form controls. |
Detail blocks take a group of controls and treat them as a type of grid. They can be defined with multiple rows and multiple columns. They must be linked to the master record of the form in order for the content to be automatically updated and are read-only. Detail blocks can be unliked (to the outside – they still must have links if they contain multiple tables internally). Unlinked tables also exist, but there is no automatic support for them so must be individually managed.
Saving and Loading Forms
Forms can be saved in the Superbase NG XML format and use the file extension .sxf. They can also be saved as SIMPOL source code. This is useful since these can be compiled into the program rather than load at runtime.